Configure and Set up a Minimum HA Deployment
Hope you guys, you have gone through my previous blog which elaborate “What does mean by Minimum HA deployment?”
Before we dive into configuration, let’s see the Prerequisites.
- Two binary packs of WSO2 SP.
- A working RDBMS instance to be used for clustering of the 2 nodes. (Currently support only for MySQL.)
- In the {SP_HOME}/conf/worker/deployment.yaml file, we have to define the data source to be shared by the nodes in the cluster.
- Download the MySQL connector from here. Unzip the downloaded MySQL connector, and copy the JAR (mysql-connector-java-5.*.*-bin.jar) into the {SP_HOME}/lib directory of both nodes.
- In order to retrieve the state of the Siddhi Applications deployed in the system in case of a scenario where both the nodes fail, state persistence must be enabled for both nodes by specifying the same datasource/file location.
- A Siddhi client must be available to publish events to both the nodes in a synchronized manner where publishing of events is not stopped when one receiver node goes down.
This blog has 2 sections as follows,
- Cluster Configuration.
- Starting the cluster.
Cluster Configuration
You need to do the following configurations in the {SP_HOME}/conf/worker/deployment.yaml file for both the WSO2 SP nodes in the cluster.
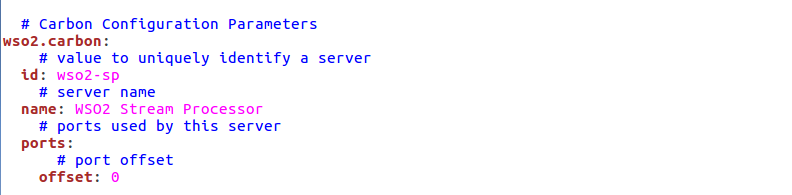
Step 1: Each node should be identified by a unique ID. Enter different IDs for the id property under wso2.carbon for each node.
Step 2: The cluster.config section should be updated as follows to allow two nodes in the cluster to coordinate effectively.For more information regarding cluster coordination refer Configuring Cluster Coordination.
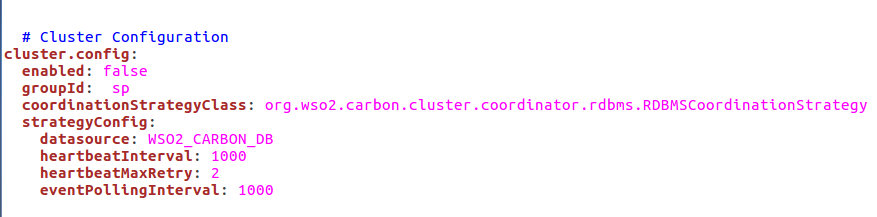
Note: In order to cluster the two nodes together, enter the same ID as the group ID for both nodes (e.g: groupId: sp1).Enter the name of the configured datasource shared by the nodes in the cluster as shown in the above image.
Sample datasource configuration for a MySQL datasource.
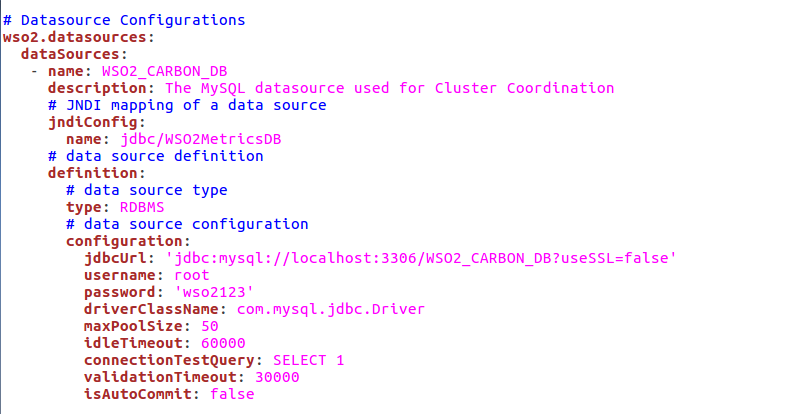
For more details, refer Configuring Datasources.
Step 3: You need to add a new section “deployment.config” to the deployment.yaml files in both nodes. Do the configurations as given below:
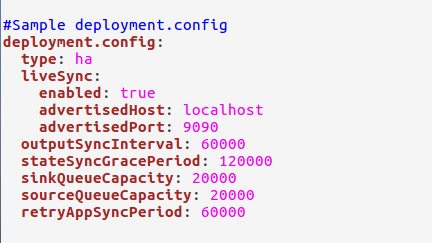
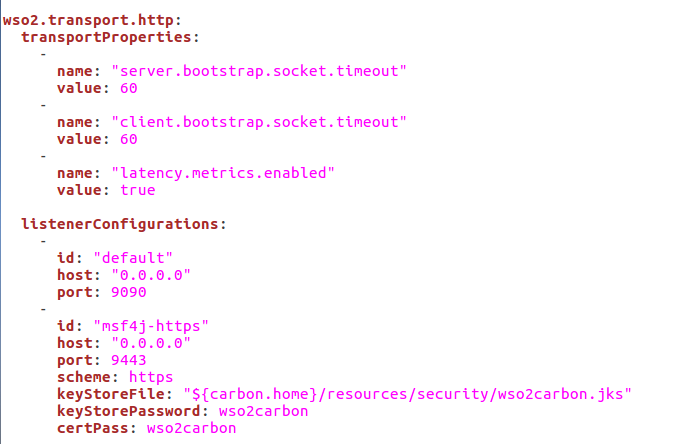
Note: In {SP_HOME}/conf/worker/deployment.yaml file under the ListenerConfigurations section of wso2.transport.http, you have to configure the listener ports for both nodes in the cluster. Use different port numbers for http and https for both nodes to listen to different ports and corresponding values changed in the liveSync section. And the offset property under the port section of the wso2.carbon section found in {SP_HOME}/conf/worker/deployment.yaml should also be changed in one SP instance to avoid conflicts when starting both servers.
Note that in a Docker environment the host and port that is mapped to these listener configurations should be given in the liveSync section.
To enable direct communication between the nodes the user credentials of the other node should be given as follows:username: <username> # if this is node 1's config's enter node 2's usernamepassword: <password> # if this is node 1's config's enter node 2's password
The default username set for a node is admin with password admin
Note: An application is not deployed unless the active node provides a valid state for that application.
Starting the cluster
Write a sample Siddhi application and save in the {SP_HOME}/conf/worker/deployment/siddhi-files directory in both nodes. To make sure the successful synchronization between the both nodes, add the siddhi application into the siddhi-files directory before you start the server.
In deploying Siddhi applications in a two node minimum HA cluster, it is recommended to use a content synchronization mechanism for Siddhi applications must be deployed with both worker nodes. You can use a common shared file system such as Network File System (NFS) or any other shared file system that is available. You need to mount the {SP_HOME}/conf/worker/deployment/siddhi-files directory of the two nodes to the shared file system.
Navigate to {SP_HOME}/bin directory and issue the following command in both nodes to start them.For Windows: worker.bat
For Linux : ./worker.sh
The output will be as follows without ant errors if you do the cluster configuration correctly,

(Full disclosure: I wrote this blog during my internship at WSO2 from November 2017 to April 2018)